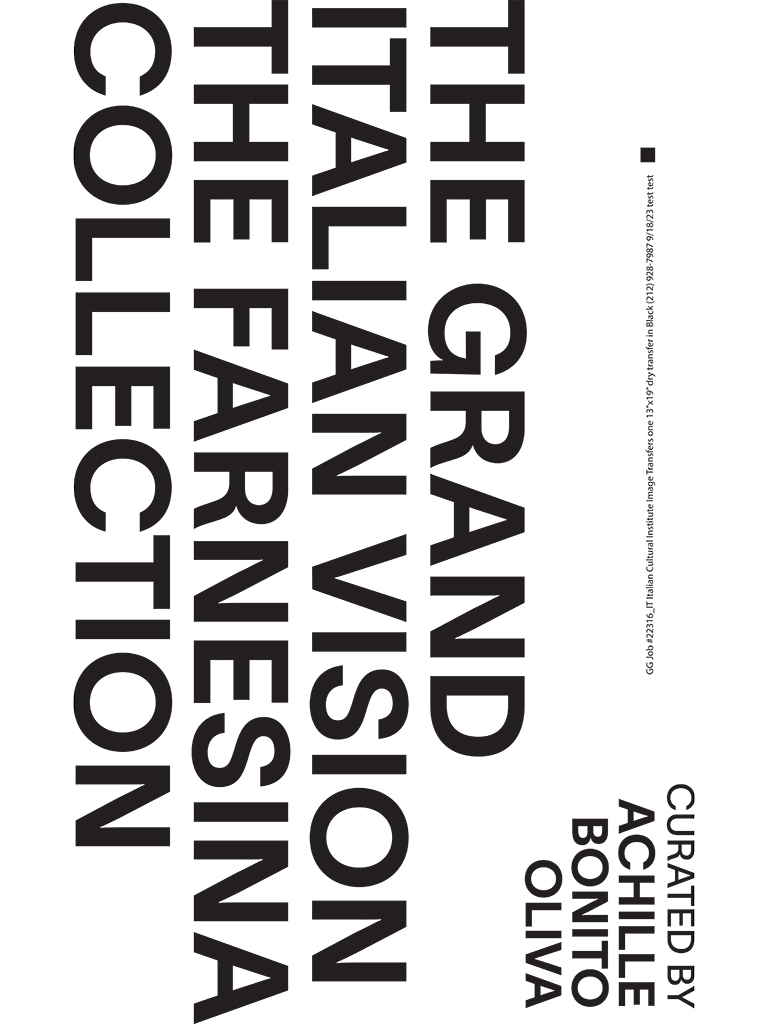
See Them In Use for The Farnesina Collection
Dry transfer lettering is ideal for wall text and exhibit captions.
At Image Transfers, many of our clients have worked with us for years, and we know them well. But we also meet new people who are curious about our process and what we do. They often begin by inquiring about how dry transfer museum labels are made, step by step.
To help answer the most commonly asked question about how we make transfer decals, we’re pleased to offer a case study using a recent project for The Farnesina Collection. It involved extensive use of our rub-on transfers for art gallery labels and captions in two New York exhibitions.
Custom dry transfers are an excellent choice for text in small and medium sizes on walls or any physical object. They are the replacement method of choice for the former Letraset lettering and are in high demand for art exhibit labels at museums and galleries.
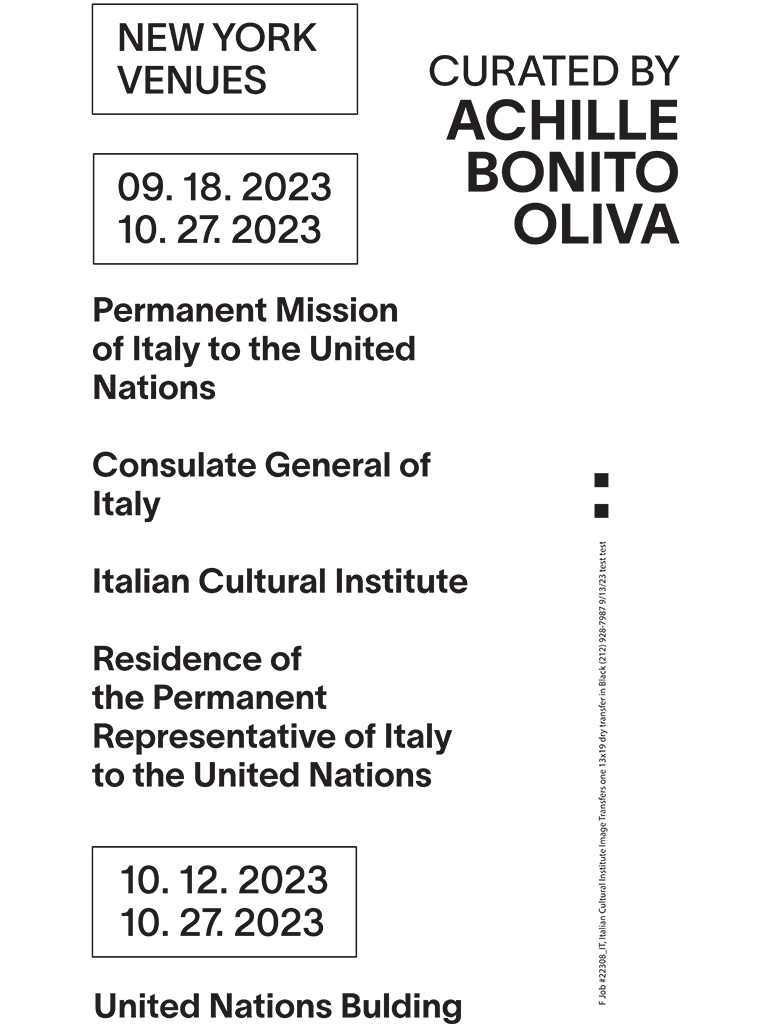
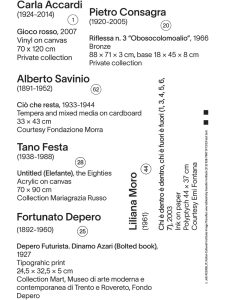 About the Decals Shown in This Article
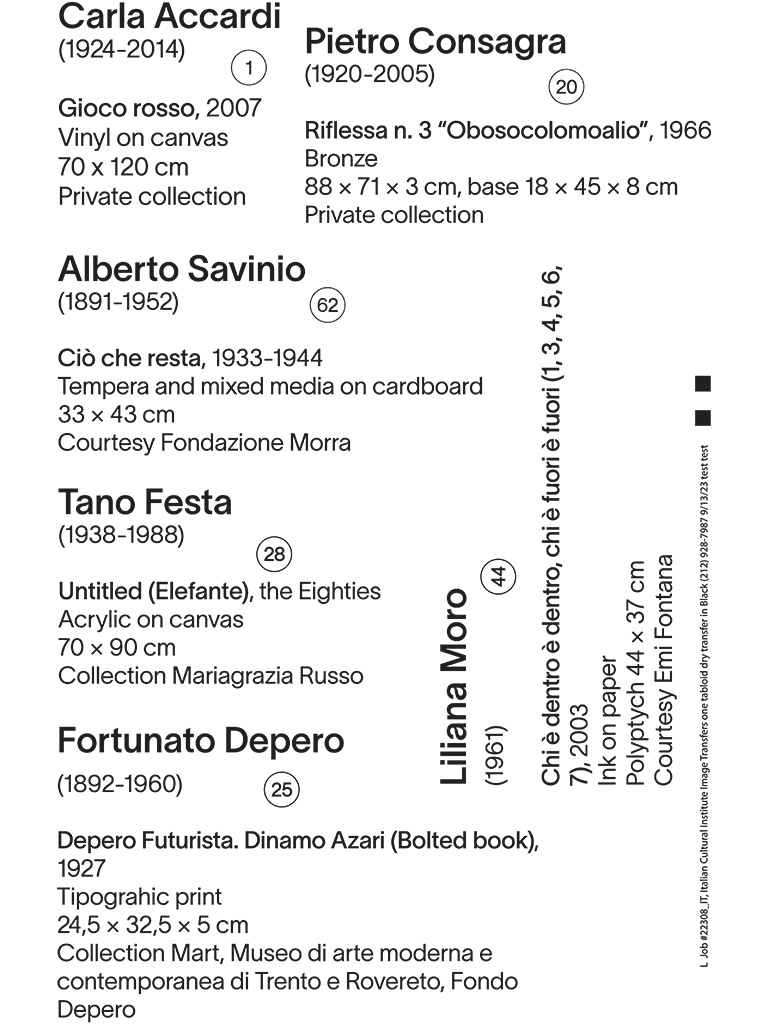
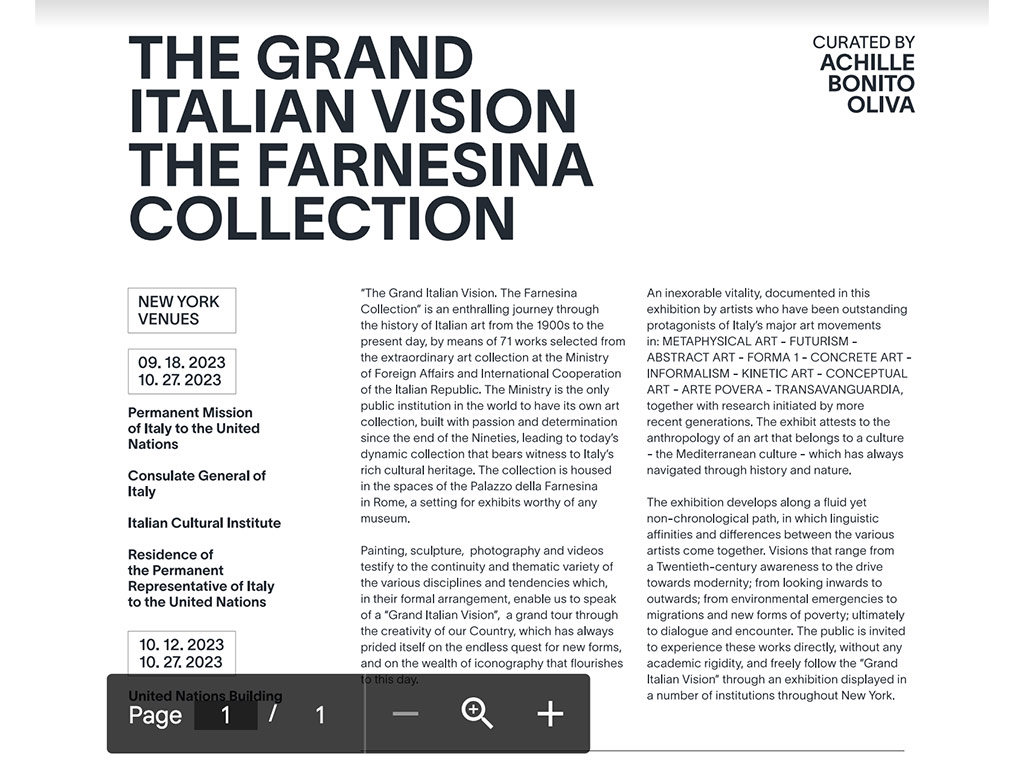
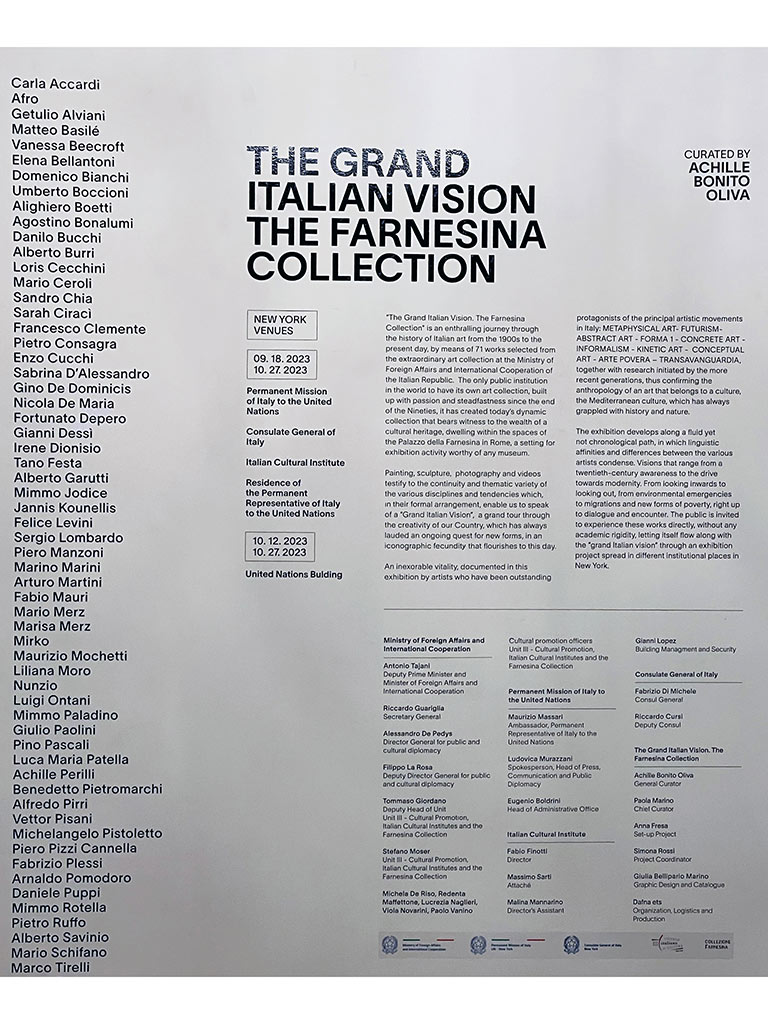
As a quick background, the Farnesina Collection includes 71 artworks selected from the extraordinary collection at the Ministry of Foreign Affairs and International Cooperation of the Italian Republic, the only public institution in the world with its own art collection.
The artworks were exhibited in New York City at the United Nations Building and the Italian Mission to the United Nations in late 2023.
Step by Step: How to Make Dry Transfer Decals
Producing dry transfers, rub-down transfers, or rub-on decals involves a multi-step process that ensures high-quality and accurate results. Here’s an overview of each step in the production process:
Step #1: Client File Upload and Review
Custom dry transfers are produced from files you supply, so you receive the exact look you want.
The process begins with your digital file because the design of custom dry transfers lies with you. Ideally, you submit a file in Adobe Illustrator or Adobe .pdf format, with all fonts outlined. It is crucial to ensure the fonts come out correctly on your final transfer decals.
Luann, a production director on our team, carefully reviews the uploaded file to ensure it is in the correct format and size. She will contact you with questions if discrepancies or issues show up at this stage.
Step #2: Printing and Film Negative Output
After the initial review, the approved design file goes to our production team. They prepare to print the design in the requested sizes, such as 8.5 x 11″, 11 x 14″, or tabloid-style 11 x 17″. Then, they output a film negative from the design file for use in the exposing step. It creates a stencil for the dry transfer decals.
Step #3: Preparing the Transfer Slick
Simultaneously, with the film negative output, the printers begin preparing the transfer slick, which is the substrate that will hold the final decals. They apply a layer of lacquer ink onto the slick, serving as a base for the design and helping it adhere to the final surface.
Next, they apply an adhesive layer to the slick. The adhesive facilitates the quick, one-step process to rub the design onto the target surface. A light-sensitive, water-based emulsion is the final element applied to the transfer slick. It makes the slick light-sensitive and helps create the stencil for the design.
Step #4: Exposing the Slick
 In this step, we place the film negative on top of the prepared slick. The two are positioned in an exposing unit. The exposing unit emits light, and the areas covered by the design on the film negative allow light to pass through, exposing the corresponding areas of the slick; the unexposed areas remain protected by the emulsion.
Step #5: Washing and Cleaning
After exposing, our production team processes the slick to reveal the design. The unexposed areas, protected by the water-based emulsion, are washed out. Then, we use a solvent to clean and remove any remaining traces of the emulsion from the slick.
This step ensures that the design is accurately transferred to the slick and is free from unwanted marks.
Step #6: Finalizing Your Custom Dry Transfer
With the design exposed and cleaned, the final step involves washing away the water-based emulsion to reveal the adhesive layer beneath. The transfer slick is now ready for use. You can rub or press the slick onto the desired surface in a single step, transferring the design as a dry transfer decal.
Try These Additional Uses for Rub-On Decals
If you have a surface or object that’s smooth, clean, flat, and dry, a custom dry transfer will work for lettering, logos, and any other visual detail you need to add.
They are excellent for wall text and captions, as shown in this article from The Farnesina Collections’ recent exhibits. But the additional uses below are also popular with our clients.
- Product prototypes
- Custom and small-batch products
- Scale models
- Vintage product restorations
- Small and medium indoor signage
If you’re considering rub-on transfers for a use not listed above, please call or contact us online to discuss your needs. We can provide more information and give you advice based on experience.
Conclusion: How Custom Dry Transfers Are Made
Dry transfer decals look precise and clear when applied to many surfaces.
The five-step process shown in our case study from The Farnesina Collection explains how custom dry transfers are made. They apply in a quick single-step process and precisely replicate your design, giving you essential control over the creative process.
Our production artists’ attention to detail at each step, from file review to the final transfer, ensures that the end product meets your expectations and helps your project turn out perfectly.
Image Transfers are custom dry rub-on transfer specialists. We make only one thing: custom rub down transfers for graphic designers, artists, and model-makers. A dry transfer (or rubdown) is an image printed on a translucent sheet. The image has a coating of adhesive on its back. The image is transferred from the translucent sheet onto another surface by applying light pressure in a rubbing motion. The dry transfer can be applied to any surface that is free of dust, grease or oil. Dry transfers are referred to as DRY because they are applied dry, without the use of water or solvents. A dry transfer is not a slip-off label or a water decal, instead, the transferred image appears as if it was printed directly onto the item. Our dry transfers are opaque because we back the colors with white, so our rubdowns can be applied to a surface of any color without changing the color of the rub-on transfer. We consider dry transfers a semi-permanent application. A top coat of clear lacquer can make them more permanent. Our production artists can match all Pantone Matching System (PMS) colors including Metallic. Standard transfers are semi-gloss but we also offer matte and uncoated finishes. We deliver within as little as 24 hours. -- Specialties: Custom Rub Down Dry Transfers, Art Gallery Signage & Museum Labels, Custom Transfers for Product Prototypes, Comps & Mock-ups, Dry Transfers for Scale Models. Decals for Glass and reversed transfer decals for inside glass cases.
Hello. I have a John Deere 325 Lawn Tractor (1998) and the instrument cover is damaged. Are you able to make a new instrument panel? JD P/N is M136158. I can provide a photo if needed. The panel is thin plastic (Mylar?) with battery and charging graphics. Thank you!
Rick, We are not the right source for you. All our transfers are custom with clients supplying artwork. If all you had was a photo we would have to create vector artwork from that photo for our process and our transfers are not suited for outdoor usage. May we suggest contacting John Deere? Maybe they can help? Some “off the shelf” replacement parts for you? We appreciate your inquiry. You might also want to “google” instrument panel for JD M136158. You never know if there is that specific part already available on-line. Best of luck. Luann